Working with images throughout your intranet
Spice up internal communications with a variety of photo experiences
Hello Peer,
If an image is worth a 1,000 words…
An image, in your intranet, with a caption and alt text, automatically resized for multiple screen resolutions, put into a CDN on your behalf for optimum page performance, in the right context… well, that’s worth at least a thousand unsent emails. And that’s an inbox I can get behind.
This article explores numerous ways you can enhance your communications - all within reach - to tell stories within stories, to speak volumes to your colleagues. Use images throughout your intranet sites, pages, news and lists to visually enhance all - no matter the word count.
Once you know a few image hows and whats across Microsoft 365, then, it’s a snap.
Use stock images and organization-approved assets
When you want to either look polished or be compliant, turn to using images that are provided to you - either from Microsoft or direct from your organization. It’ll put the ooh into any page, the ahh in any news. And, you’ll get less throat clearing from your brand team :).
Microsoft provides all customer thousands of stock images for every occasion, with more coming each quarter. Click on Stock images and sift through various categories or perform a keyword search. Luminosity is my favorite category when building out a general newsletter - really makes the header pop!
And if your company purchases its own stock images, or has approved product shots, you can find these in the organization-approved library - just click on Your organization when adding an image; easy for admins to set up for the benefit of all.
Learn more about adding a picture or image file to a SharePoint page and creating an organization assets library.
Additional sources - when you go to add images, as shown in the two screenshots above, you’ll find there are a number of sources you have access to - some might even be your own sources:
From a Web search | Bing.com provides inline search to display and deliver images from the Web, starting off with nice categories, or you can search inline with preferred keywords. The one caveat is the onus is on you to respect listed use rights, including copyright. Initial results are covered by Creative Commons ( CC) that enable the free distribution of an otherwise copyrighted "work."
Upload from your computer | Here’s where you’re in complete control. If you have any images on your computer, you can easily upload them into your page or news. Once uploaded, the image becomes a file within the site’s document library; easier to use next time from the cloud.
Use images already in the site | If you or someone else already maintains a folder or library of images, you can easily navigate to it and select and image from where it already is.
Use a unique document library of images as a source | One of my favorite methods, similar to the previous one, is where you have a set of assets in one place, the library, and intend to display them together using the Image gallery web part. The library become the source and automatically displays each image cleanly on the page. More on this specific web part below.
Learn more how to insert images, icons, and more in Microsoft 365.
Working with header graphics for pages and news
With all the above methods for adding images to your pages, newsletter, internal blogs, etc. you have every right and tool at your fingertips to make the header graphic pull the reader in and emphasize the intent of your content. Beyond the site logo, you have several choices for how imagery enhances readership.
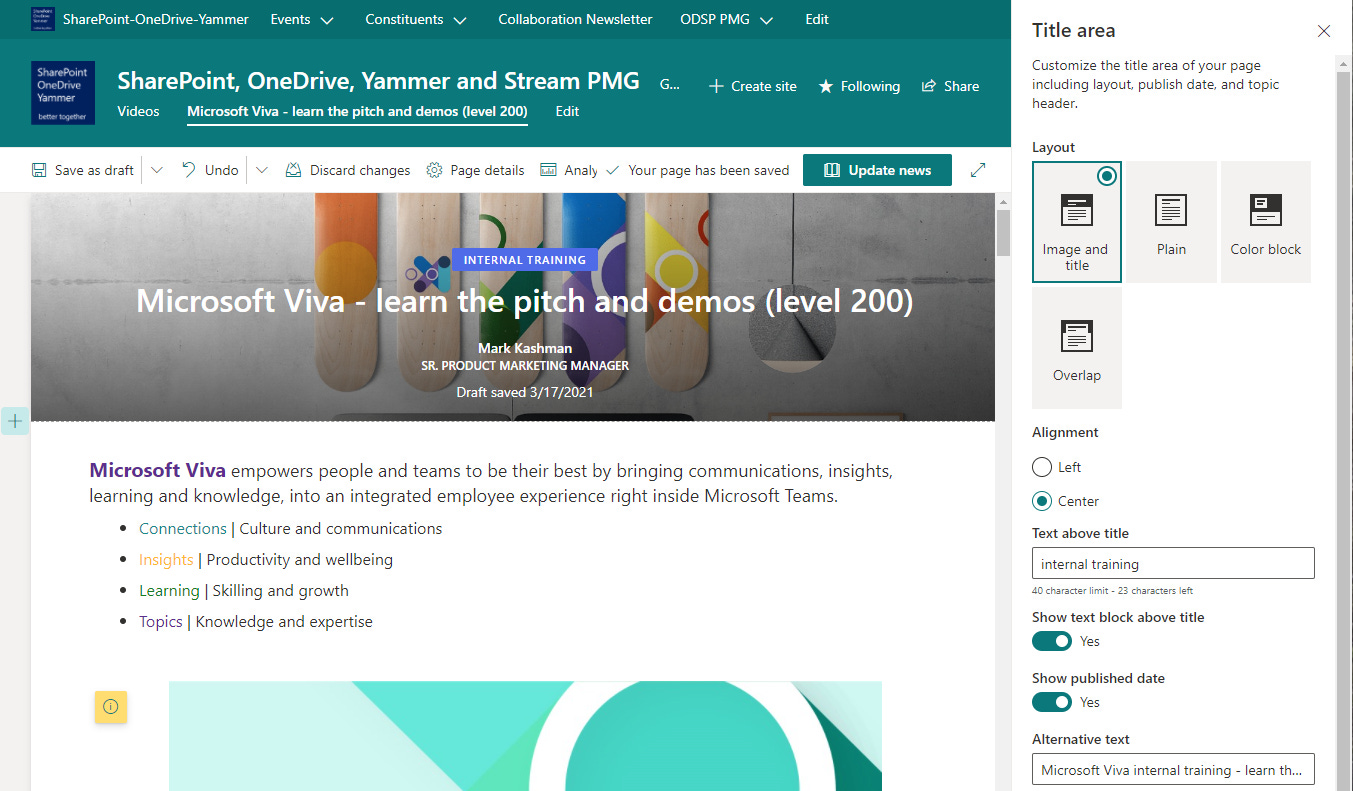
In the title area, you can overlay your title on a hero image, add a badge for visual information architecture (like below where it says “INTERNAL TRAINING”), the author, date, and more. And then play around with the various layouts to discover which works best. I’m a fan of Image and title (as shown below).

Learn more how to customize the title area of a SharePoint page or news article.
Using the Image and Image gallery web parts
Image web part
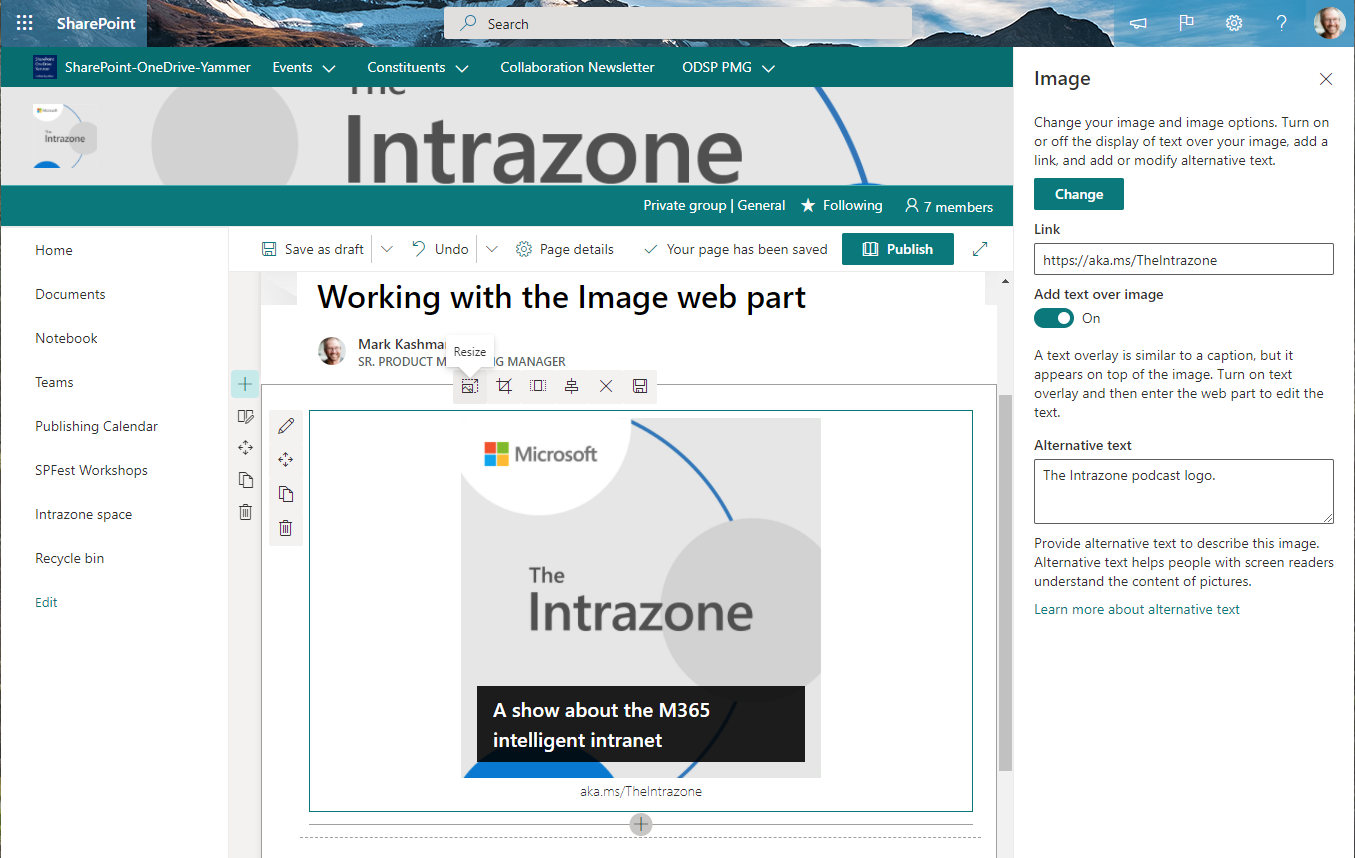
This is the easiest way to put an image on your page or news, right where you want it - and resize it, too. You can layout pages with various section layouts and columns. Then choose where you want an image, add the Image web part from the toolbox, and select your image. Here, you have the same options as laid out above, so you can pull an image from just about anywhere. Once you select your image, add text and a hyperlink to make it standout and be actionable.

For your consumers, when people click or tap on an image in SharePoint, they will see a larger version of the image in the lightbox. When viewing the image in the lightbox, the remainder of the page is inactivated and dimmed. And then, it's easy to close it and turn back to the rest of the page.
Overall, there has been a lot of new tech for uploading and working with images during the edit phase - to crop, resize, rotate, adjust ratio, add alt & overlay text, and hyperlink. It’s all inline as you design your page and then SharePoint works for you behind the scenes so the page or news looks great on any device.
Learn more how to use the Image web part.
Image gallery web part
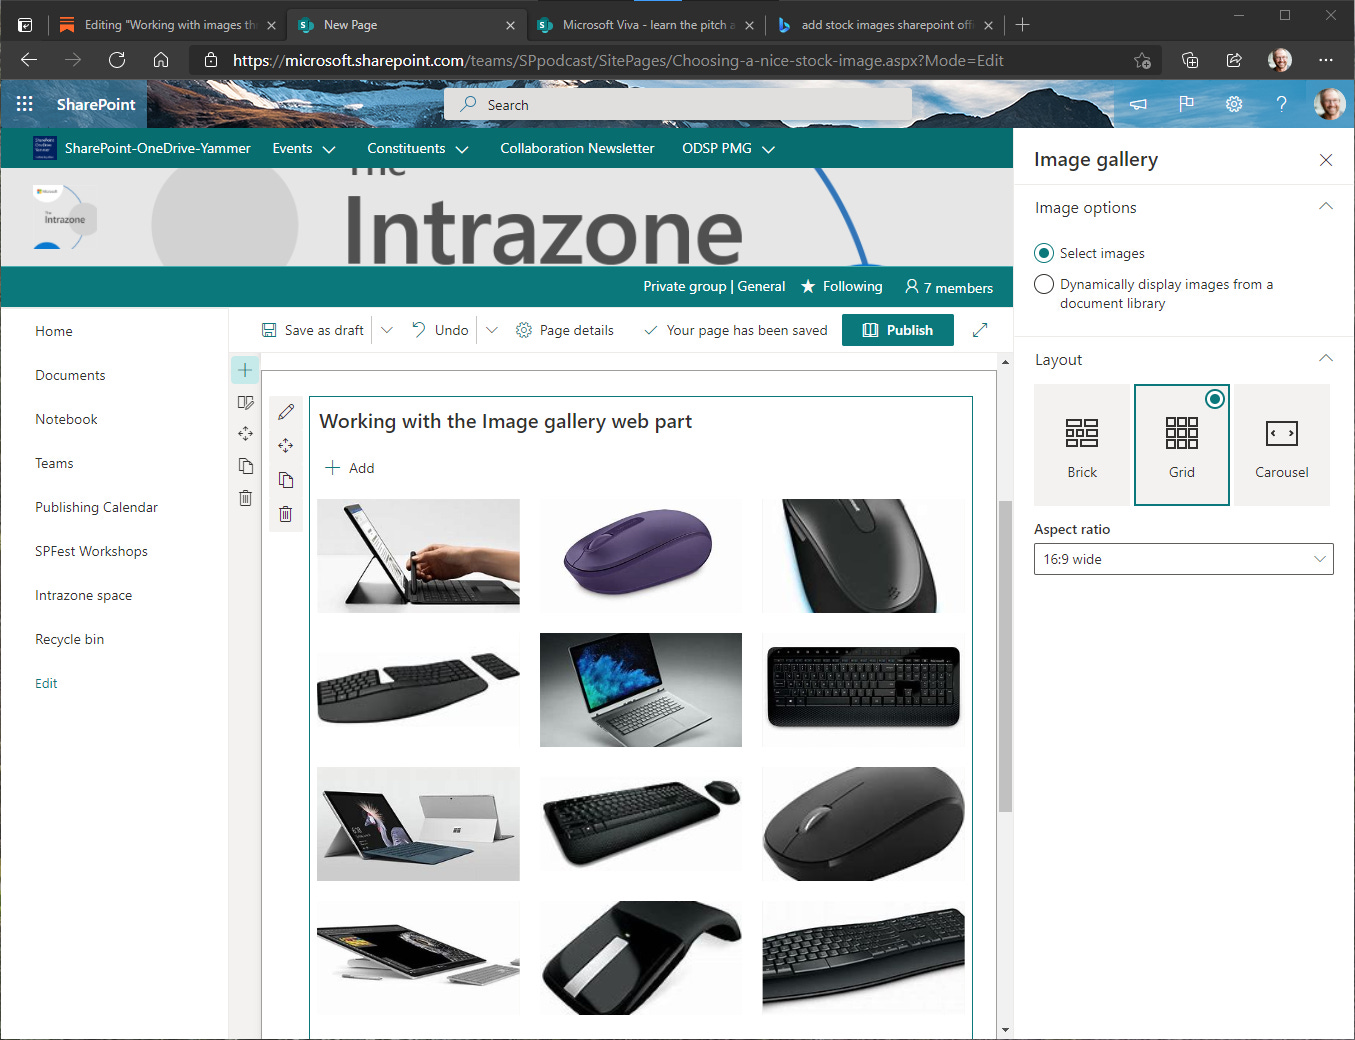
One image may be all you need. But, if the story you are telling requires a collection of images to be presented, SharePoint has you covered. The Image gallery web part allows you to upload numerous photos, from any of the above-mentioned sources, and display them together in a variety of ways. My favorite is Carousel set to automatically cycle through images every 2 seconds; truly keeps the page alive and draws attention.

And as mentioned above, you can choose to dynamically display images from a document library, giving you an easy way to add, edit, remove the photos in the library, and the page automatically updates and displays based on your changes. You’ll feel like a Web editor in no time, without having to edit the Web.
Learn more how to use the Image Gallery web part.
Use of images within Microsoft 365 apps plus a Windows 10 app snip tip
Microsoft 365, and Windows 10, offer a number of apps that help make storing, backing up and using images a breeze. The use and how is one thing. The result is another. And it’s the another that I want to breeze through a few examples and tips to highlight additional ways to working with images throughout your intranet.
The Hero web part | Front and center, the Hero web part brings actionable pizzazz to any site - most commonly used in communication sites. It’s one you can layer which rich imagery + text + links - like a visual megamenu, if that’s not mangling a few SharePoint terms too much. And, it’s tiles configurable - to span the entire page, or slot it in a section layout of your choice. Learn more how to use the Hero web part.
SharePoint document libraries | When you switch view options from List view to Tiles view, thumbnail previews get automatically generated by the service. This is true for hundreds of file types when viewing files in Teams, OneDrive, and SharePoint, and Windows 10 when using Files On-Demand. This makes it easier to find a file visually, saving you time.
OneDrive photo backup | This is a twofer. You can use OneDrive sync to backup known Windows 10 desktop folders; this includes the C:\Users\YOU\Pictures folder. And if you use OneDrive mobile, you can automatically save photos and videos with OneDrive for Android or iOS.
Microsoft Lists | It’s easy to associate images to list items by using an Image column. Then Gallery view brings the images to the forefront. The Asset manager list template has a default Image column built in, and it’s easy to add one to any list to bring the value of images + information. Learn more about using an Image column and create, change, or delete a view (including Gallery view). You can also review this previous Kashbox article, “Microsoft Lists: create and use views“
PowerPoint | It’s not news to be able to add images to a PowerPoint deck. The power of imagery for presentation precedes this article by a few decades. But these days, it’s easy to add images alongside text and let PowerPoint help you with design ideas. Learn how to create professional slides with PowerPoint Designer.
Sway | You don’t Sway. Well, you must give it a try. It’s a great tool for storytelling, and can be used both inside and outside your organization. For me, Sway gives me a way to share a photo-heavy story externally in a managed fashion. Might I Sway you with two examples? 1) “SharePoint intranet customer stories“ & 2) “Three Irv’s Storytime Stories”
Windows 10 Snip & Sketch | The quickest way to grab a screenshot and add it to your page or news article is to press Windows logo key + Shift + S to open the snipping bar, then drag the cursor over the area you want to capture. My favorite feature is to “Snip in 3 seconds.” This gives you time to set up the page with a drop-down menu opened or an on-hover message showing. Get snipping with these screen capture tips & tricks.
BONUS VIDEO 📺 “How to author dynamic intranet pages and news: Tips and tricks from the product team.” This session, presented by PMs Rachel Lambert and John Sanders, highlights many of the features listed above - aka, tons of image-related demos:
Final thoughts
Images speak volumes so your reader doesn’t need to read volumes. Once you learn how to bring imagery into your comms, your impact will undoubtedly increase. And, it’s fun. Start with important messaging and positioning, and then bring it home with hero and supporting images; keep the engagement with your readers engaging.
Let’s round it out with a few relevant, poignant words from three wise souls:
“The eye should learn to listen before it looks.” - Robert Frank
“The painter constructs, the photographer discloses.” - Susan Sontag
“The whole point of taking pictures is so that you don’t have to explain things with words.” - Elliott Erwitt
To learn more about how images are sized in different layouts, see Image sizing and scaling in SharePoint modern pages. Note: If you're a SharePoint admin, we recommend enabling a Content Delivery Network (CDN) to improve performance for getting images; learn more about CDNs.
Cheerios, Mark “Say Cheese” Kashman 📸 #smile!
P.S. (Pun Sharing)
Get your eye rolls ready to bake… one pun from me, @mkashman 🙄, and one from the world:


