Hello Peer,
From the infancy of an idea, through review and revision, to prep and publish - a document grows. The document lifecycle will have foreseeable twists and unexpected turns, numerous view and edit collaborators, and planned processes. And, you are in control every step of the way.
Windows, Word and OneDrive work together to help you keep things moving forward. I’ll highlight a few tips and tricks that help smooth out the collaboration edges. It’s easy to start, easy to share and simple (important) to get back to the ‘most up to date’ document fast - with confidence.
Throughout this article, I’ll highlight how I work with Windows, Word and OneDrive to write and prep a blog. The same tips and tricks could easily be applied to the draft and delivery of a client contract, or work behind a business proposal.
Start the .docx where you need the document to be
As a product marketer for OneDrive and SharePoint, I often get the question, “Where do I put my file(s) in Microsoft 365?” A few refining factors prescribe the answer: Who needs to have access to the document and when, and might it change over time…?
To review further, I suggest reading the “Should I save files to OneDrive or SharePoint?” article on support.microsoft.com. [the Help outcome when a question gets asked more than once ;)]
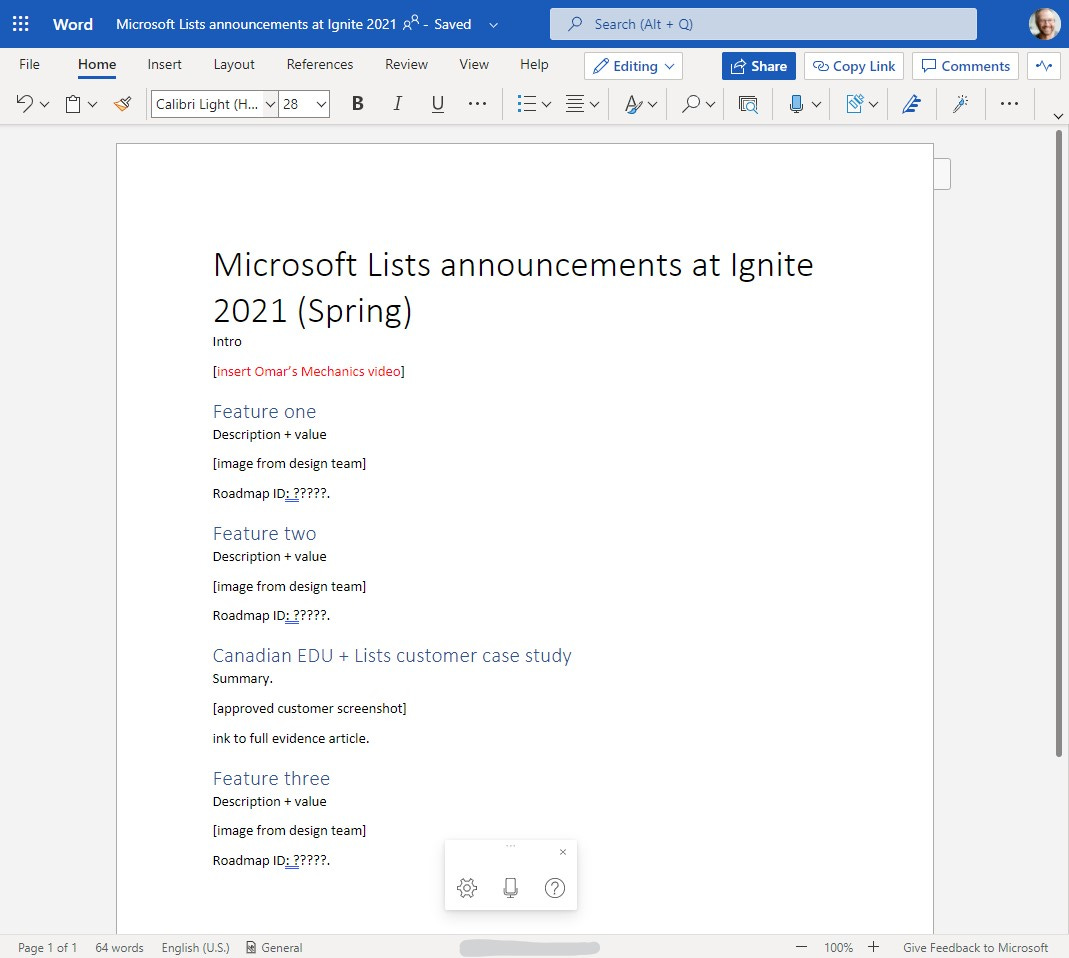
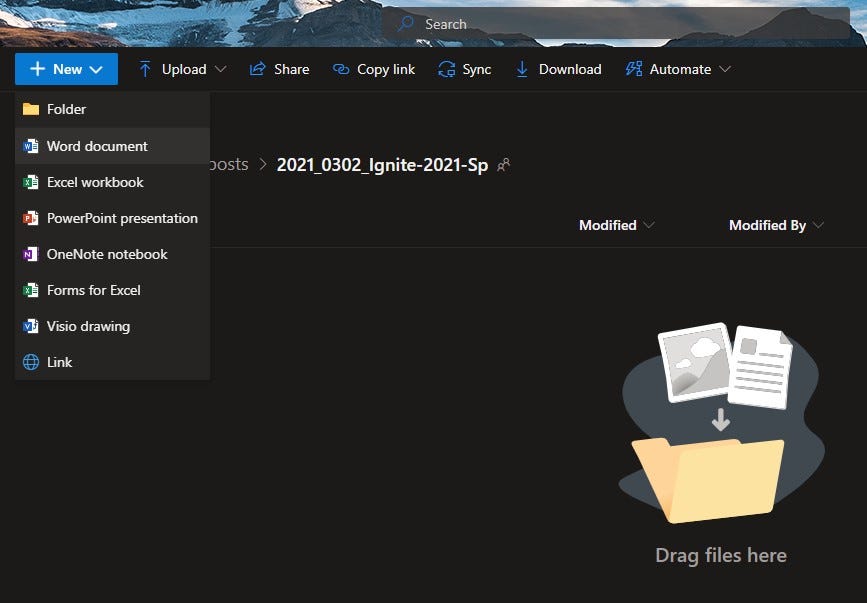
For most blogs, I start in OneDrive. I use the + New drop-down menu to create a new, blank Word document - in a new or existing folder. This way, it starts ‘in the cloud’ with default permissions set to ‘only me.’
I then begin drafting my outline in Word for the web. At this stage, I’m interested in title, intro, image and video placeholders - including notes and reminders. In this example, I have an upcoming blog I’m working on to disclose new Microsoft Lists features to be announced at Ignite 2021 (Spring; 3/2/2021).
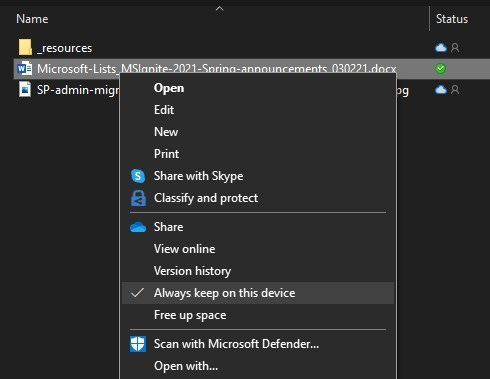
Before I get too far beyond outline, I use OneDrive sync to Always keep (the file) on this device. By how I started above, the document is already ‘synced’ based on where I put it. And even though working from home is more prevalent, I still select “Always keep on this device” - part of my laptop habit for offline; no matter, it treats the synced copy as local source while I’m actively working on the doc which improves performance.
One Windows + OneDrive tip within the tips: Use OneDrive and Storage Sense in Windows 10 to manage disk space. This is the “a silent assistant that works with OneDrive to automatically free up space by making locally available files that you aren't using anymore online-only again.”
For quick access, “Pin to this list” using the Word app (icon) in the Windows taskbar
For important docs I’m actively working on, I make the Windows taskbar work for me. First, pin the Word app to your taskbar. Right-click over the Word icon to open the Pinned/Recent list. Hover your mouse over the doc, and right-click again selecting Pin to this list so the doc appears at the top of this quick-access, pop-up menu. It’s a pin/pin situation!
Any time you want to open the doc, wake the PC from sleep, right-click on Word in the taskbar and click the now-Pinned doc. It opens from OneDrive with any and all content updates intact. Note: at this point in time beyond outline, I begin primarily working in Word desktop - mainly out of habit and preference to the level of control as we close in on what the blog will look like when published.
Learn more how to use the taskbar in Windows 10 and OneDrive sync.
For event more access, pin in Word Backstage: Web leads to mobile
Another step I take is a similar pin action in the Backstage of Word. From within Word desktop, click on File in the upper left to go into the Backstage. Here, you can create a new file, open an existing file, print, save, change options and more. I choose to Pin important, active documents so they appear in the Pinned tab, just under the Recommended for you section.
Learn more about starting Backstage with the File tab.
Once pinned within Word, the document becomes easier to get to - especially when you’re on the go. This might be less often these days, but still, when a lightning bolt of idea strikes, reaching for your phone is the fastest way to type within the ‘aha moment’ before it’s lost.
Learn more about the new Office Mobile app for tablets and phones.
Now, no matter where I open and use Word, the document is front and center, ready for me to work on it and share it with others.
Share with colleagues and co-author on a single version - the single source of truth
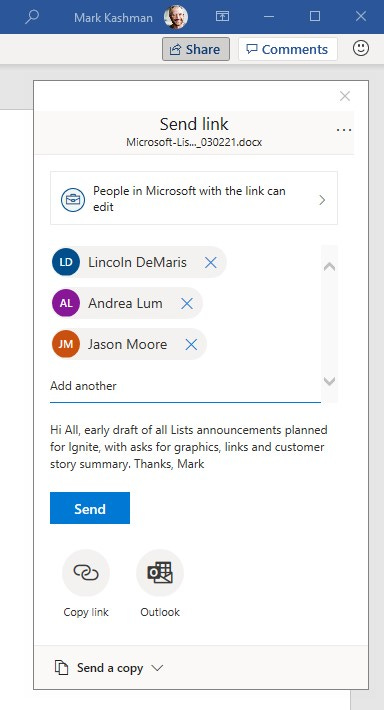
You guessed it. It’s time to share your document with others - the way you want to share it with them. Since it’s in your OneDrive, you choose to provide edit rights to co-authors or keep it ‘view only’ for reviewers (view and comment only).
Learn the ins and outs of sharing from the OneDrive Files engineering team.
I’ll condense the part where we finish the draft: lots of people work on it, we rewrite, add screenshots, put in links to videos and help articles, make comments, etc. - again, all on the same document; no version madness and permissions remain within my control.
Move the .docx to change ownership or open review to broader team(s)
OK, draft complete. Phew! I like getting to this part. And it usually means I have to open up the doc for further review - sometimes with additional process behind it. For me, all of the above happens within my direct marketing team along with my engineering peers. Our goal is to agree on what we plan to disclose and how we want to represent the product, customer value, etc.
Then, we loop in additional reviewers - from PR, legal, leadership and peer marketing teams - to comment on and approve. Our unifying goal: address comments, accept changes, and refine down to a ready-to-publish blog we all are comfortable with.
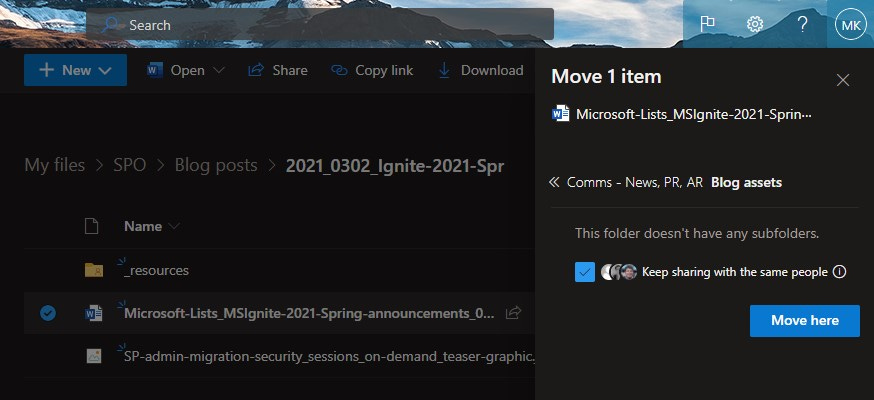
It’s at this stage that I use the Move to feature to move the same document from my OneDrive to another location. In this case, a folder in a document library within the Comms channel of our evergreen Events team using Microsoft Teams. That might sound like a mouthful. It essentially means, any and all members who need to review and approve any and all comms per a certain event (here, it’s Ignite), will automatically gain access to the document based on where I move it to. And if need be, you can tie the document to a managed business process that gets triggered upon arrival in the new location.
Note: Microsoft Teams uses the same file storage platform - SharePoint. OneDrive, too, is built on SharePoint in Microsoft 365.
Learn more about moving files and folders between OneDrive and SharePoint (and Teams).
Final thoughts…
I’m excited to get the Microsoft Lists Ignite 2021 announcements blog through all the above - beyond this nearly-real, hypothetical tips and tricks example. I’m in the thick of the actual writing and gathering phase, busily co-authoring with my engineering peers. Soon, we’ll move to broader review and approval. Ignite is just around the corner.
I hope this article shined a light on a few Windows + Word + OneDrive tips and tricks for your next blog, client contract, or business proposal.
You can learn more about what’s new for OneDrive in Windows 10, tap into best practices for collaborating with Microsoft 365, and visit the OneDrive adoption center to get started, build champions and secure your environment.
Cheerios, Mark
P.S. (Pun Sharing)
Get your eye rolls ready to bake… one pun from me, @mkashman 🙄, and one from the world:






Hi Mark, I need to check out the move to feature. An area I always struggle with is save to sites feature in Word. It always shows a subset of the sites I have access too with no ability to browse all sites? As such I often end up saving to one drive and then uploading the document in teams?